Math Portal Accessibility and ReadSpeaker
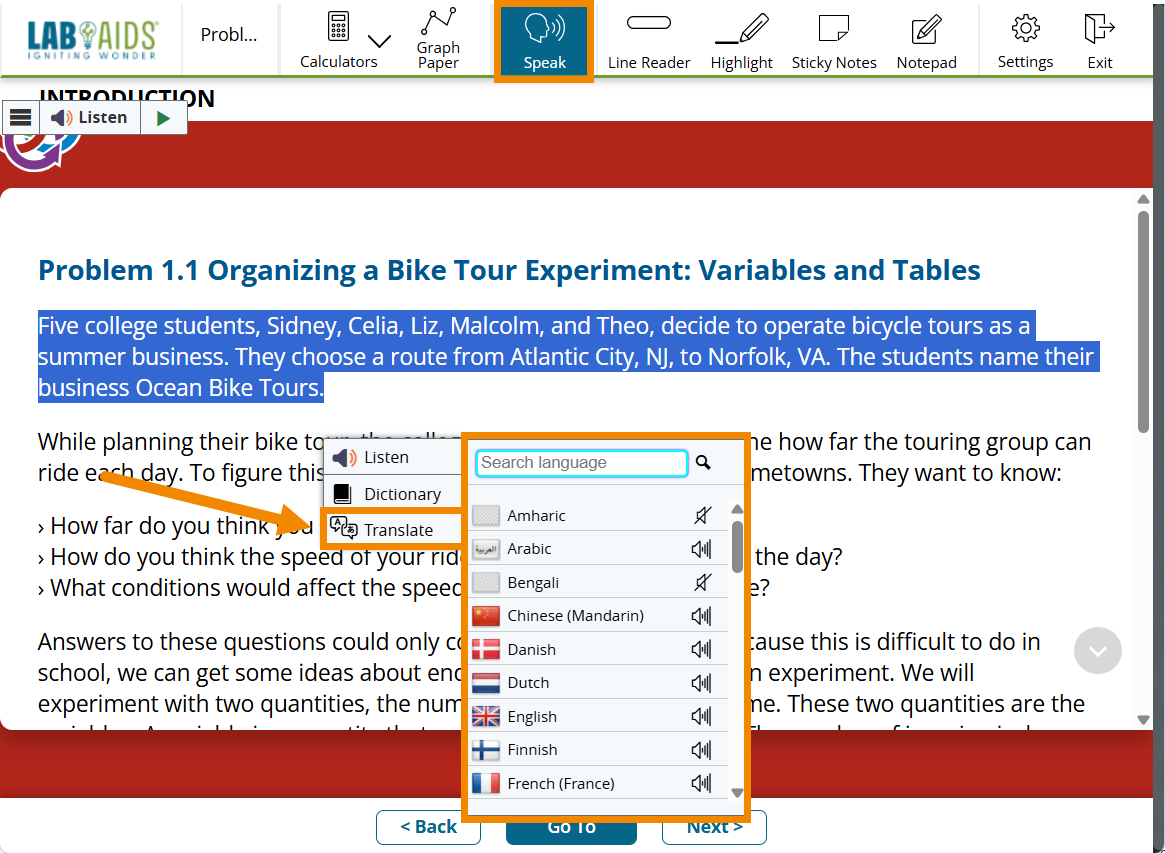
The Lab-Aids Math Portal is proud to offer ReadSpeaker to provide text-to-speech, translation, and accessibility options within all Lab-Aids student books. With ReadSpeaker, users can listen to an audio version of Lab-Aids online content, translate text and audio into 29 different languages, translate text into 56 different languages, and utilize accessibility features to aid students in reading online.
ReadSpeaker is available for all Lab-Aids online books. No downloads or plugins required. ReadSpeaker is not currently offered in the Windows or iOS apps; it is only available when accessing the portal from a browser.
ReadSpeaker Functionality
1. Languages Currently Offered:
2. How to Listen:
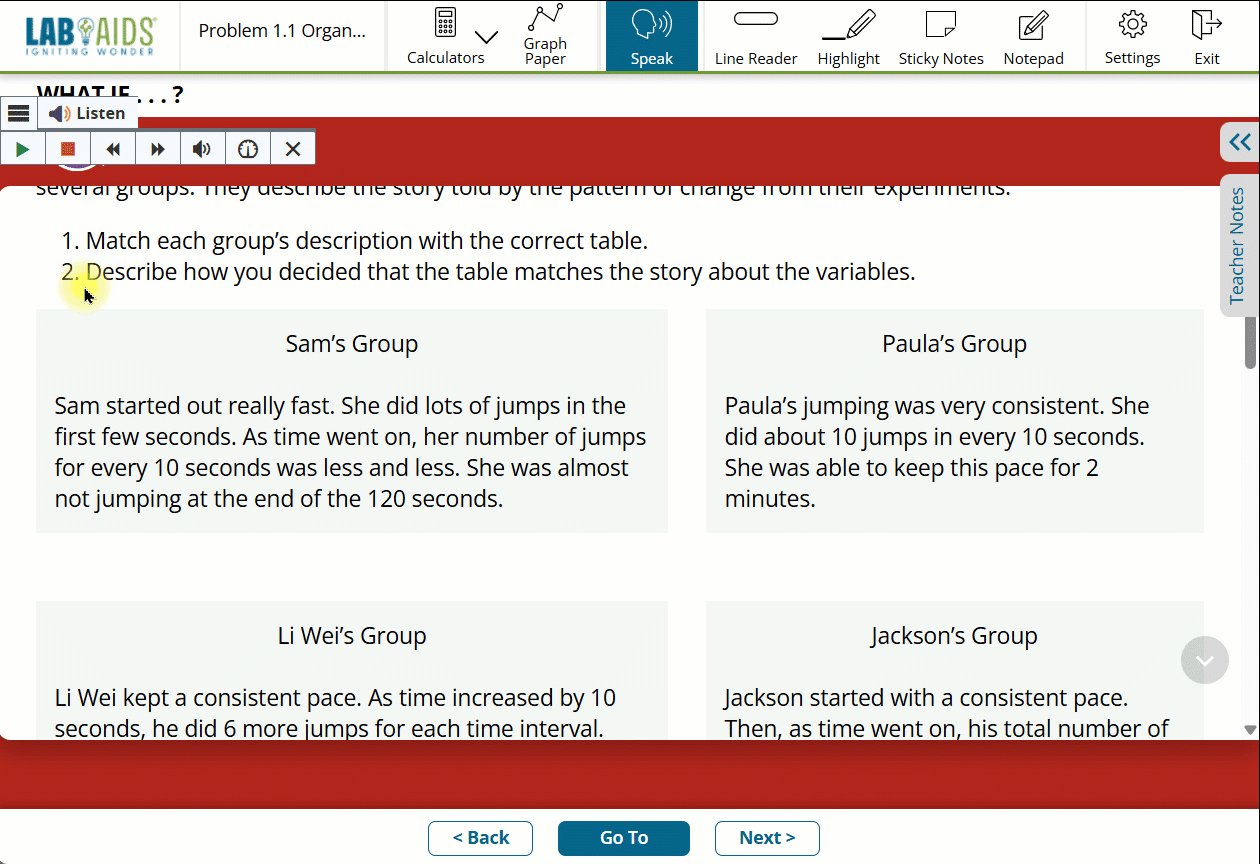
Users can choose to listen to A) an entire page, B) just a selection of text, or C) a paragraph at a time. Words will be highlighted as they are read (unless disabled in settings).
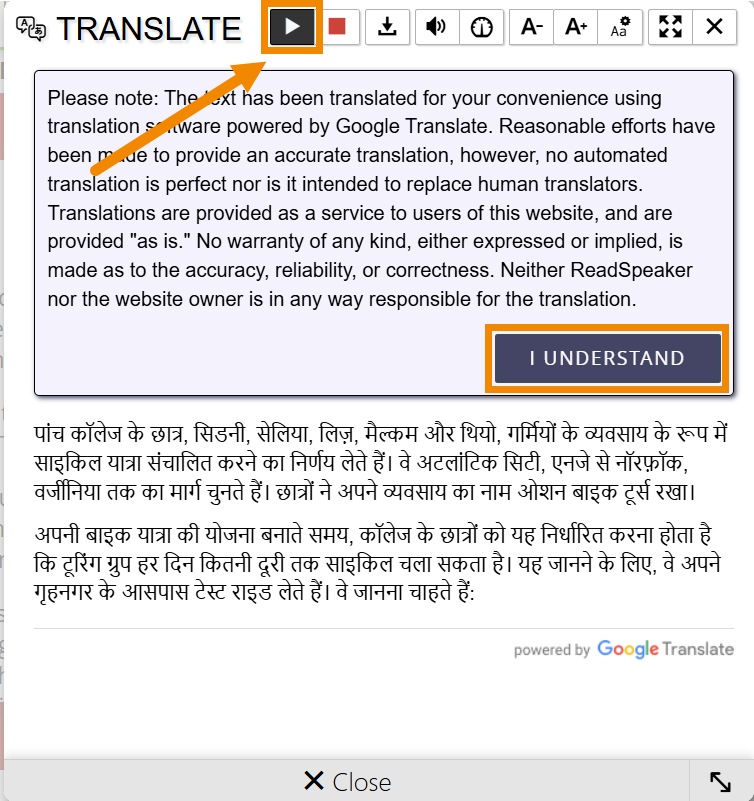
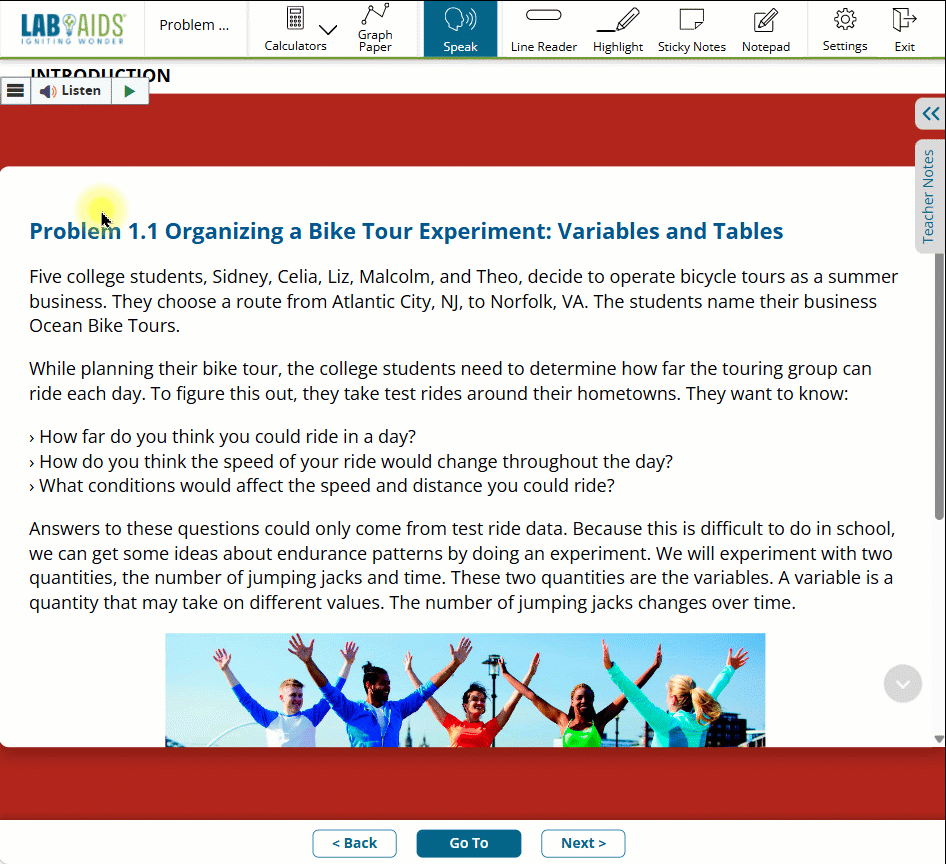
A. Listen to the entire page: Click the "Speak" icon at the top of the page. Then, click the "play" button at the top of each page to have ReadSpeaker read the entire page.
B. Listen to only a selection of text: Click the "Speak" icon at the top of the page. Highlight specific text and click the "Listen" option on the popup menu that appears.
C. Use the "Click and Listen" option: This option allows user to listen to a paragraph without needing to select it first and then click the "Listen" button. See the Click and Listen section below for more information.
Accessibility and Text Mode Settings
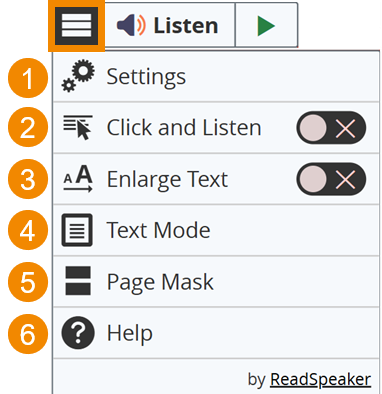
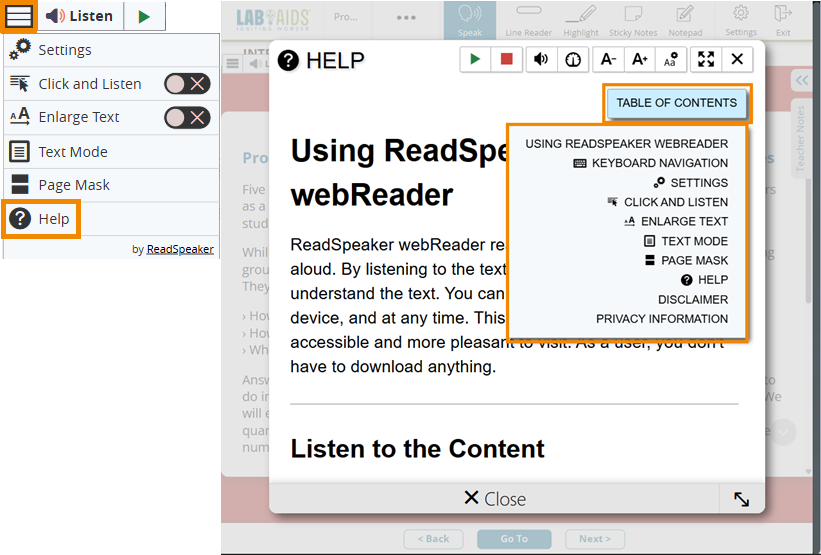
Settings and additional accessibility features in ReadSpeaker can be accessed by clicking on "Speak" icon at the top of the page, and then by clicking on the ReadSpeaker menu icon (the hamburger icon with three lines next to the "Listen" button at the top left of the page). Each of the six ReadSpeaker Menu options are explained below.
1. ReadSpeaker Menu >> Settings: Click through the available ReadSpeaker settings menus to personalize ReadSpeaker features.
-
Highlighting Settings: What to highlight (Word and Sentence, Sentence only, Word only, no highlighting)
-
Reading Tools Settings: Automatic scrolling, pop-up menu settings
-
Page Mask Settings: Change the color for focus area, color for the mask, transparency for both
-
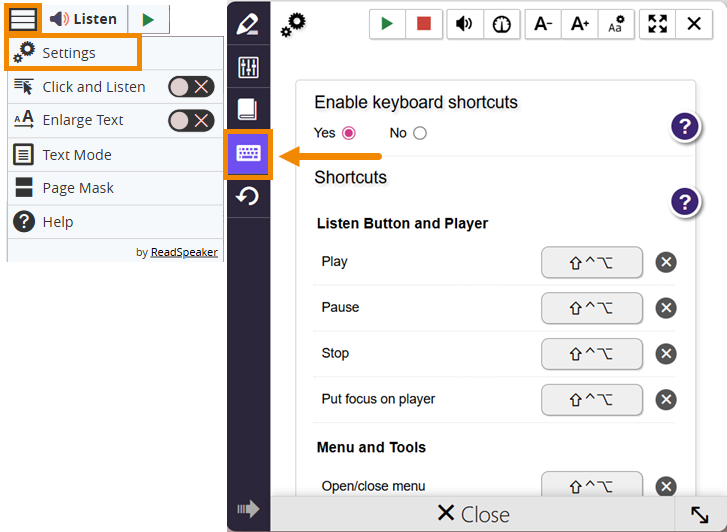
Keyboard Shortcuts Settings: View and customize keyboard shortcuts
Restore Default Settings
-
*See Text Mode section below for more detail on customizing text size, text font, text color, highlight color, etc.
2. ReadSpeaker Menu >> Click and Listen:
This option allows user to listen to a paragraph with one click, instead of needing to first highlight the text and then click the "Listen" button.
First, click the "Speak" icon at the top of the page. Then, click the ReadSpeaker hamburger menu, and then activate the "Click and Listen" feature by clicking the toggle so it turns green. Then, click on a section of text, and the paragraph will automatically be read aloud with words being highlighted as they are being read.
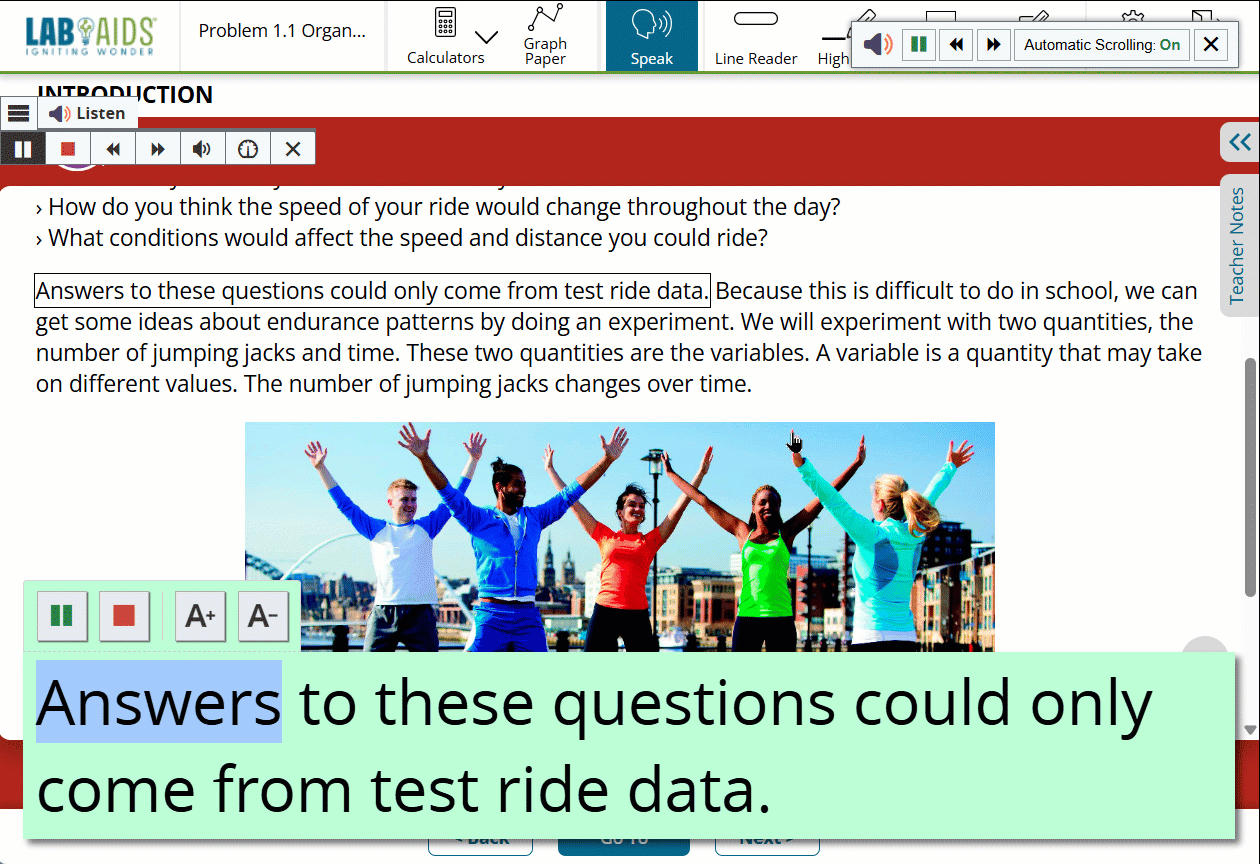
3. ReadSpeaker Menu >> Enlarge Text: Text being read aloud will display at the bottom of the screen in large font size.
First, click the "Speak" icon at the top of the page. Then, click the ReadSpeaker hamburger menu, and then activate the "Enlarge Text" feature by clicking the toggle so it turns green. Then, any text currently being read aloud will be displayed at the bottom of the screen in large font size with each word highlighted as it is read.
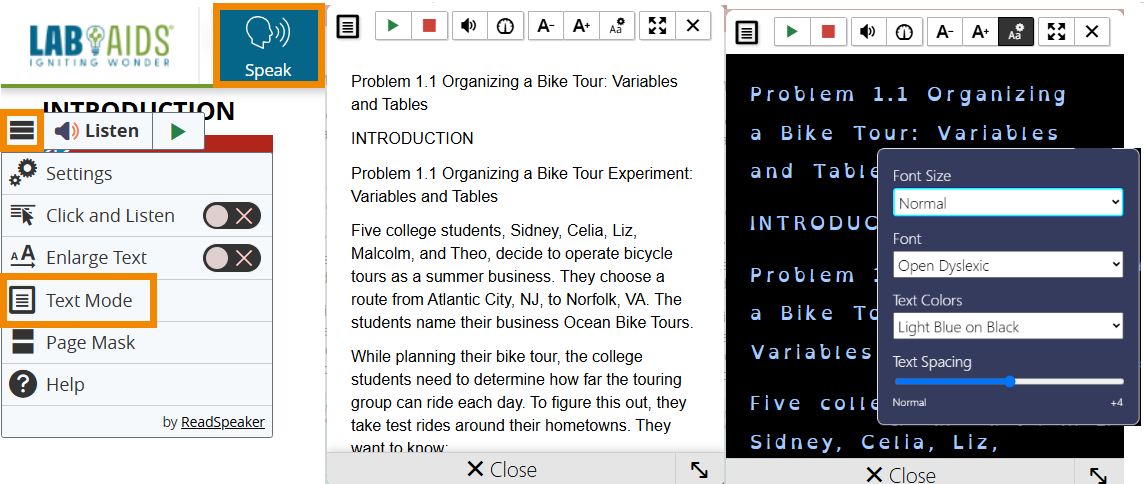
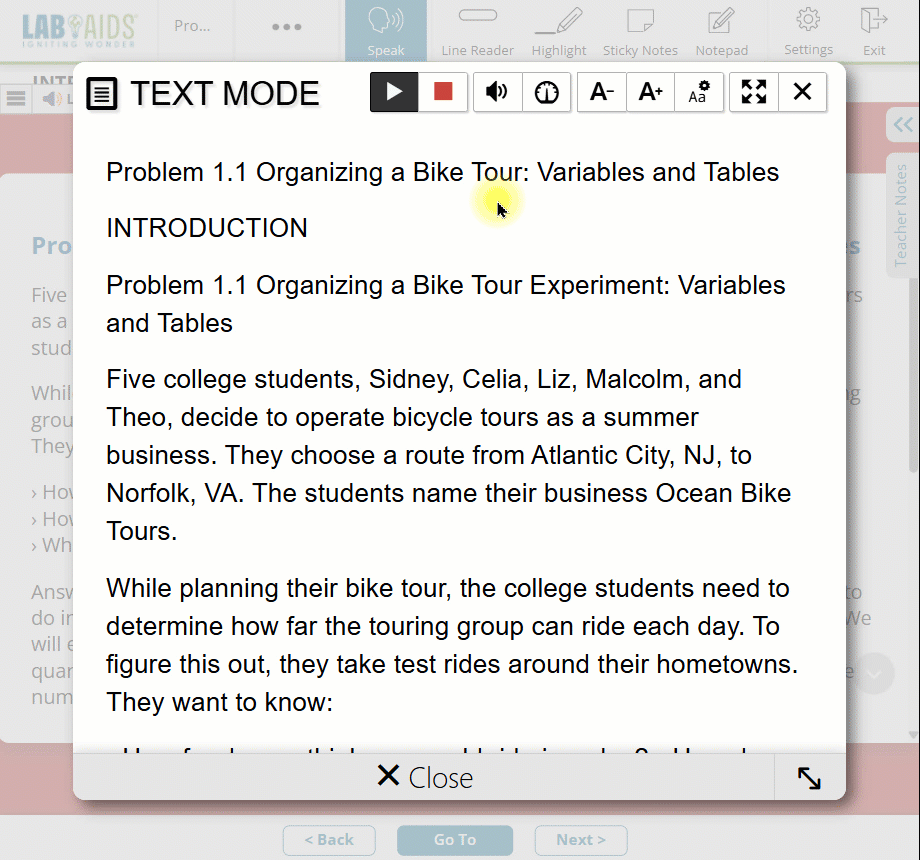
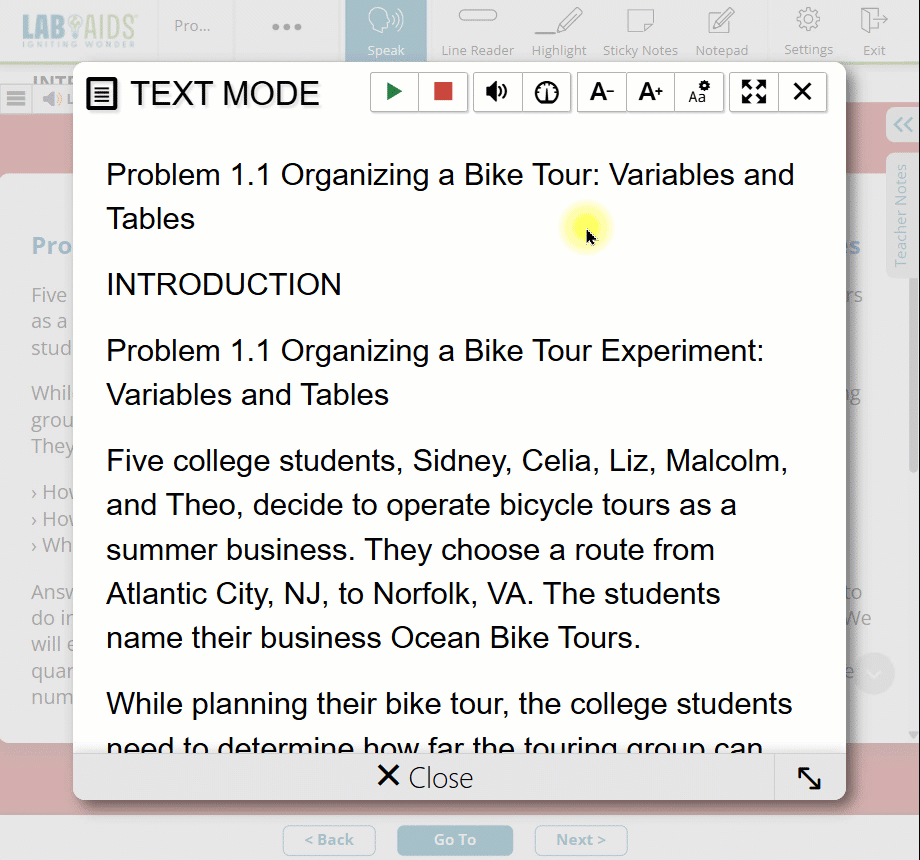
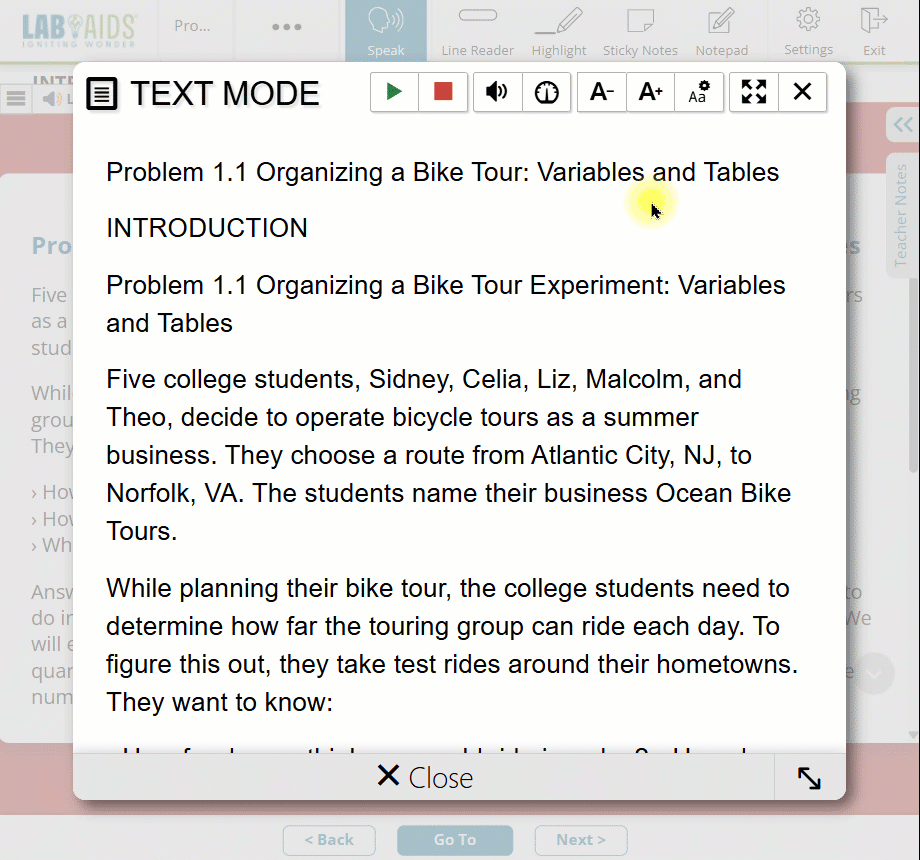
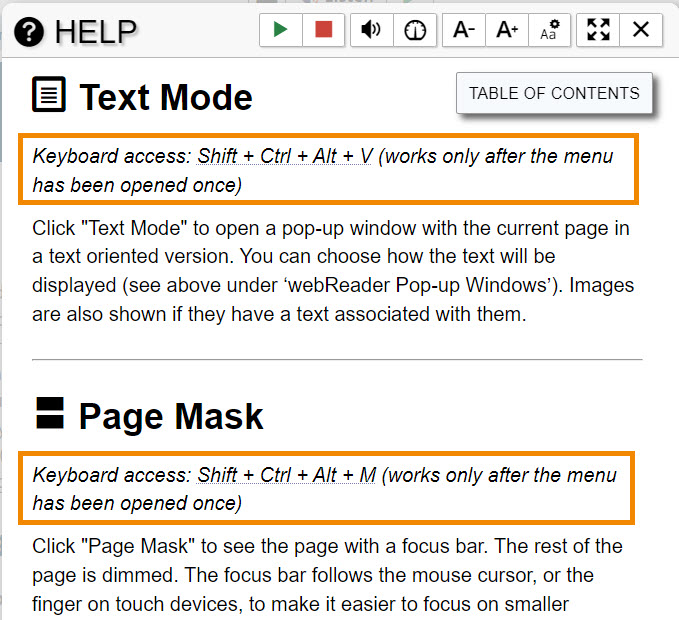
4. ReadSpeaker Menu >> Text Mode and Customizable Options: Text Mode allows users to view a clutter-free version of the web page with text in preferred font, size, and colors. This menu contains many accessibility options that are available for users to customize.
-
First, click the "Speak" icon at the top of the page. Then, click the ReadSpeaker hamburger menu and click "Text Mode".
-
While in Text Mode, user can click the "Play" button to have all text read aloud, or user can highlight specific sections of text to have just some text read aloud.
-
While in Text Mode, users can customize many accessibility options (below).
Customizable Accessibility Options from Text Mode screen:
-
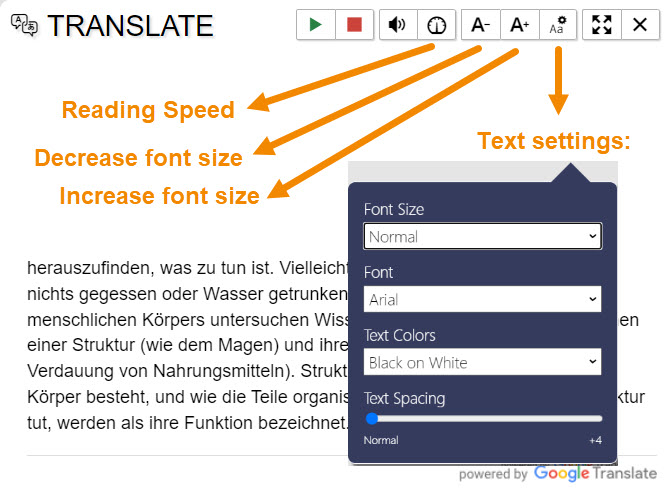
Reading Speed
-
Font Size
-
Font Type
-
Text & Highlight Colors / Color Contrast
-
Text spacing
A) Reading Speed
Use the icon with the timer to increase and decrease reading speed.
B) Font Size
Open ReadSpeaker text mode and use the two A- and A+ icons at the top to decrease and increase font size.
C) Font Type
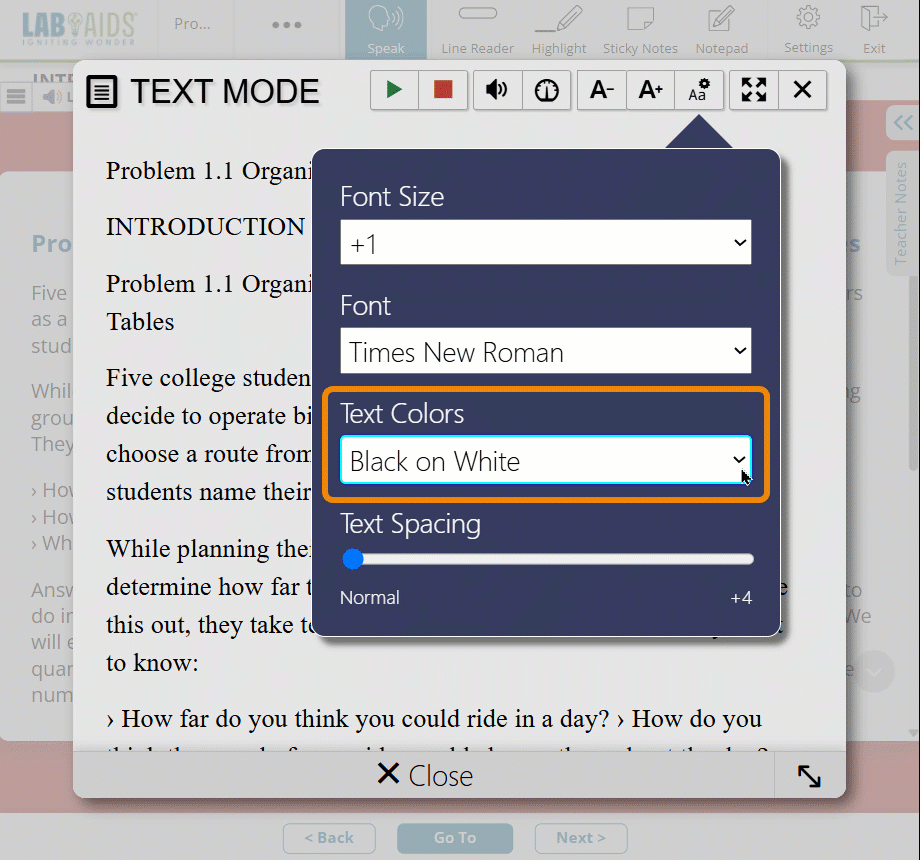
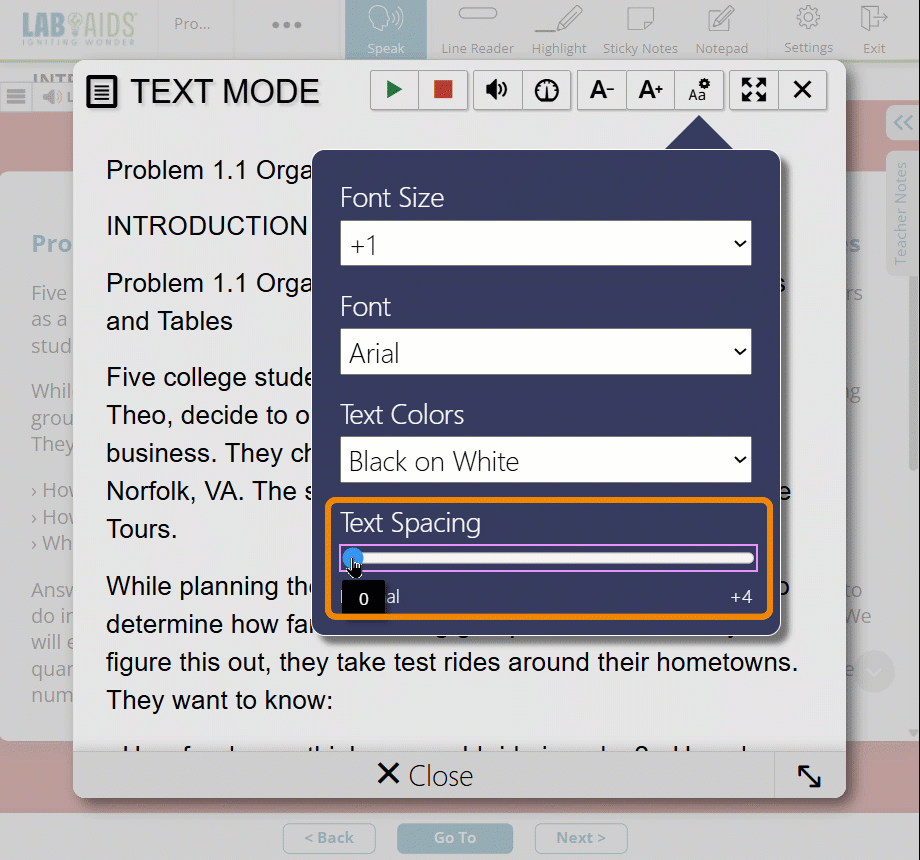
Open ReadSpeaker text mode and use the Aa settings icon at the top (third icon from the right) to choose different fonts, including the "Open Dyslexic" font.
D) Text & Highlight Colors / Color Contrast
Open ReadSpeaker text mode and use the Aa settings icon at the top (third icon from the right) to choose different text colors/backgrounds/contrast.
E) Text Spacing
Open ReadSpeaker text mode and use the Aa settings icon at the top (third icon from the right) to choose different text spacing.
5. ReadSpeaker Menu >> Page Mask
-
Page Mask allows user to view the page with an adjustable focus bar while the rest of the page is dimmed.
-
Please note: Page Mask is a purely graphic tool that can help some users focus but might not be useful to people with low vision.
-
To open/enable page mask: Click the "Speak" icon at the top of the page. Then, click on the Readspeaker hamburger menu from the top middle of the screen and choose the "Page Mask" option.
6. ReadSpeaker Menu >> Help
Additional help and information for ReadSpeaker features can be found by clicking on the "Help" menu under the ReadSpeaker menu icon (icon with three lines at the top of the page). Click the "Table of Contents" icon to view specific topics.
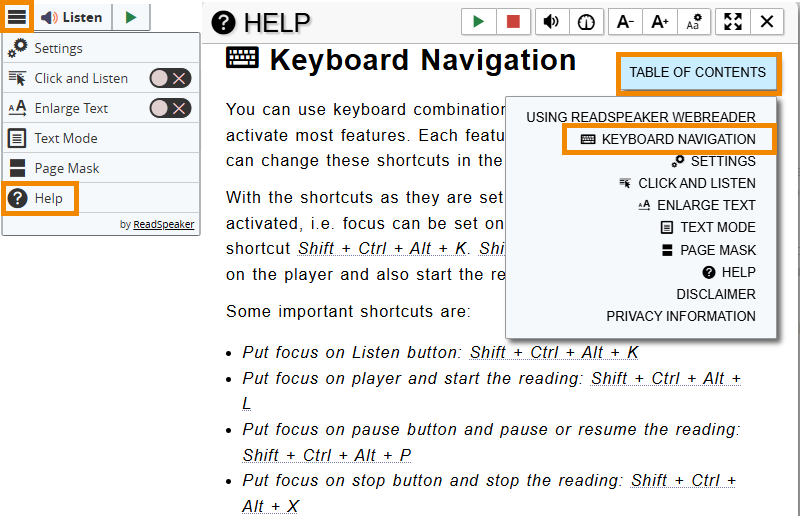
6. Keyboard Shortcuts
You can use keyboard combinations (keyboard shortcuts) to activate most features. Each feature has its own shortcut. There are a few ways to access ReadSpeaker Keyboard Shortcuts.
A) From the ReadSpeaker menu icon at the top, click the "Help" menu, and then click "Keyboard Navigation". This menu contains general information on Keyboard navigation and keyboard shortcuts.
B) The "Help" menu also contains keyboard shortcuts in italics below the heading for each topic clicked on from the Table of Contents:
C) From the ReadSpeaker Settings >> Keyboard Shortcuts menu, users can disable, enable, view, and customize keyboard shortcuts:
-
Click "Speak", and then click the ReadSpeaker menu icon. Then, click "Settings". Then, click on the black keyboard icon to access the "Keyboard Shortcut" screen.
-
Enable/disable keyboard shortcuts and customize keyboard combinations here. Click the information bubbles next to each option for more information.
-
If you make a mistake on keyboard shortcuts, you can restore keyboard settings and other settings via the instructions in part D, below.
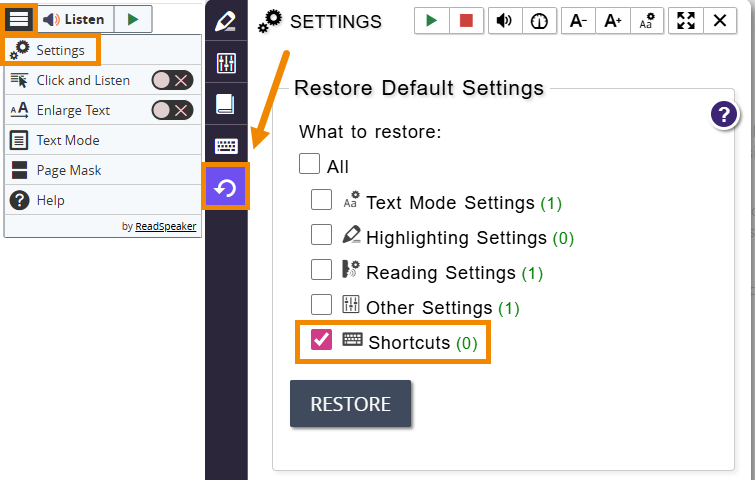
D) If needed: Restore keyboard shortcuts from ReadSpeaker Menu >> Settings >> Restore menu
-
Settings >> Restore allows users to restore various ReadSpeaker settings back to the standard ReadSpeaker system default settings.
-
To restore just the keyboard shortcut settings, deselect all options except for "Shortcuts", and then click "Restore".