How Canvas Admin adds a new LTI 1.3 Developer Key / LTI Key
This page contains instructions for Canvas Admins regarding how to set up a new Developer Key / LTI Key in Canvas using the credentials shared by Lab-Aids:
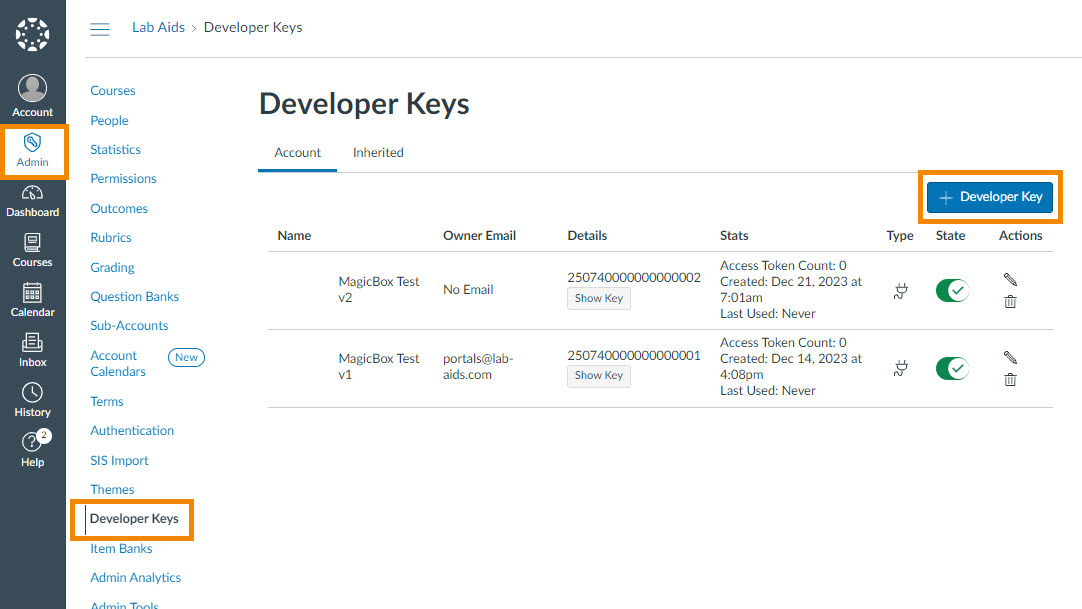
1. From the Admin left-hand menu in Canvas, click Developer Keys >> +Add Key >> + LTI Key.
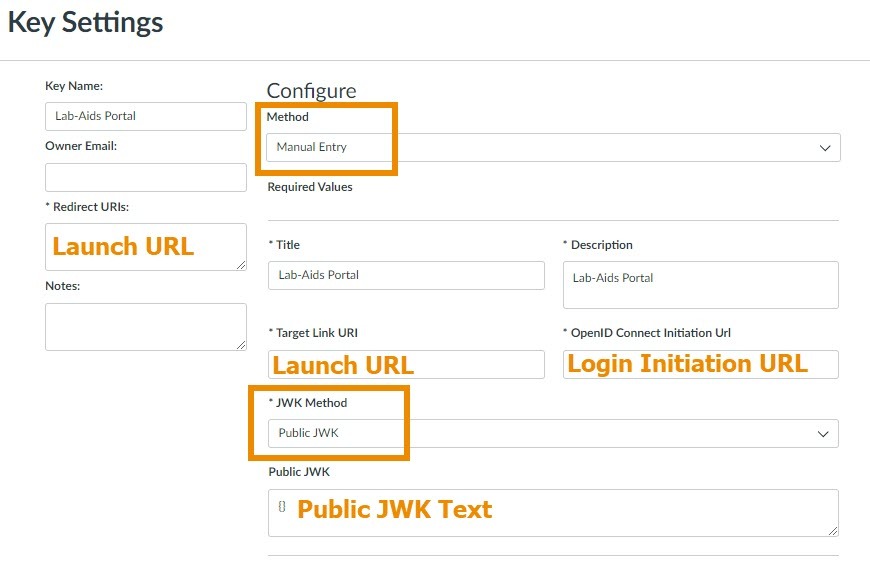
2. Enter fields in the Key Settings screen that appears:
-
Method: Select "Manual Entry"
-
Key Name, Title, and Description: Lab-Aids Portal
-
Redirect URIs and Target Link URI: paste Lab-Aids "Launch URL"
-
OpenID Connect Initiation URI: paste Lab-Aids "Login Initiation URL"
-
JWK Method: Select "Public JWK"
-
Public JWK blank text field: Paste "Public JWK Text" from Lab-Aids
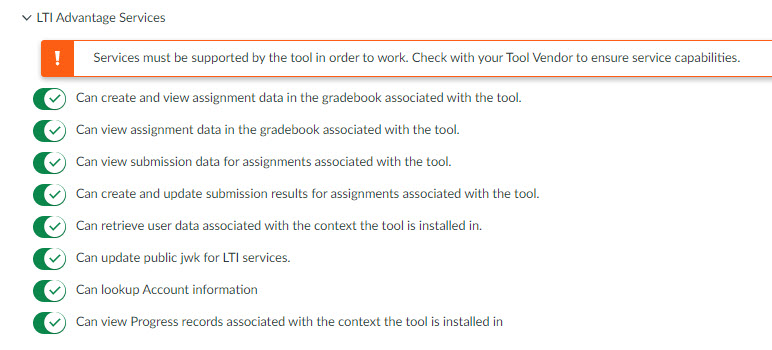
3. Under the LTI Advantage Services section, enable all options.
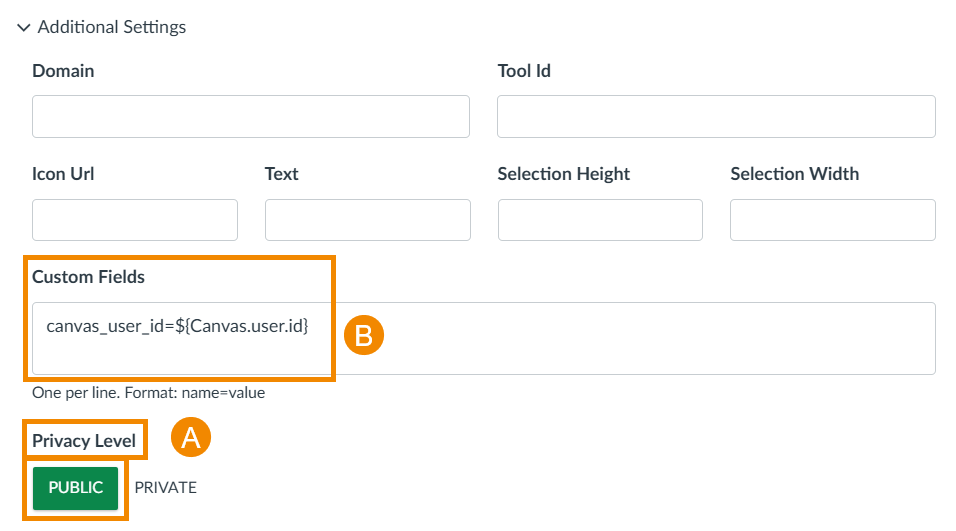
4. Under the Additional Settings section, A) Change Privacy Level to Public and B) Enter the following text into Custom Fields: canvas_user_id=${Canvas.user.id}
-
A) Public will share user’s name and email with Lab-Aids, which helps identify and troubleshoot users if needed. Private will not share any user-specific information and will instead only share a cryptic set of letters and numbers with us, which makes identifying and troubleshooting users difficult.
-
B) Custom Fields text: Grade Passback will not work until this specific text is entered in the Custom Fields field: canvas_user_id=${Canvas.user.id}
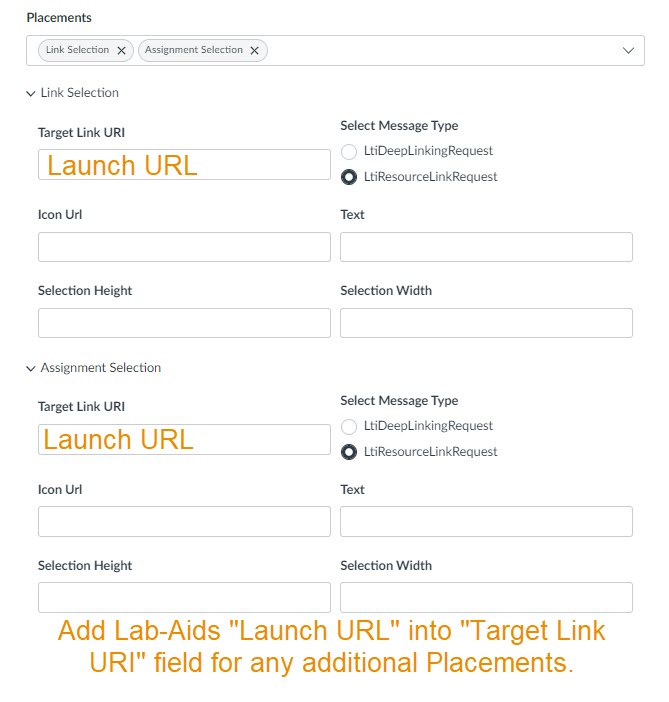
5. Placements section: Placements determine where the External Tool will be visible to users. See this "Placements Overview" document from Canvas for more information on each placement option.
-
Account Navigation and Link Selection are already selected by default.
-
Delete Account Navigation (this is to prevent the tool from displaying on the Canvas admin's left-hand School/Account menu)
-
Keep Link Selection (this is to ensure the tool displays as an option when adding an external tool to a module)
-
Add Assignment Selection (this is to ensure the tool displays as an option when adding an external tool as an assignment)
-
Optional to add: Course Navigation (this would display the tool on the left-hand menu for all courses)
6. Link Selection and Assignment Selection sections: Click the arrow to expand each section. Paste the Lab-Aids Launch URL (which is also the Canvas Target Link URI field) into the Target Link URI field for each of these sections. Ensure "LtiResourceLinkRequest" is selected under "Select Message Type".
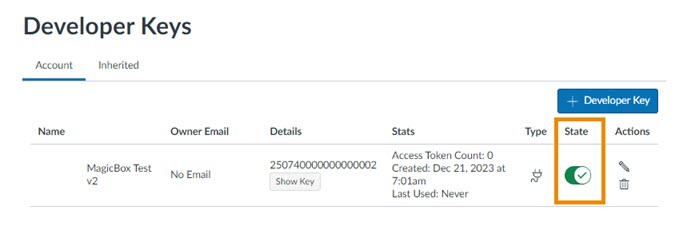
7. Click Save. Admin will be brought to the Developer Keys screen.
8. Click to enable the State toggle.
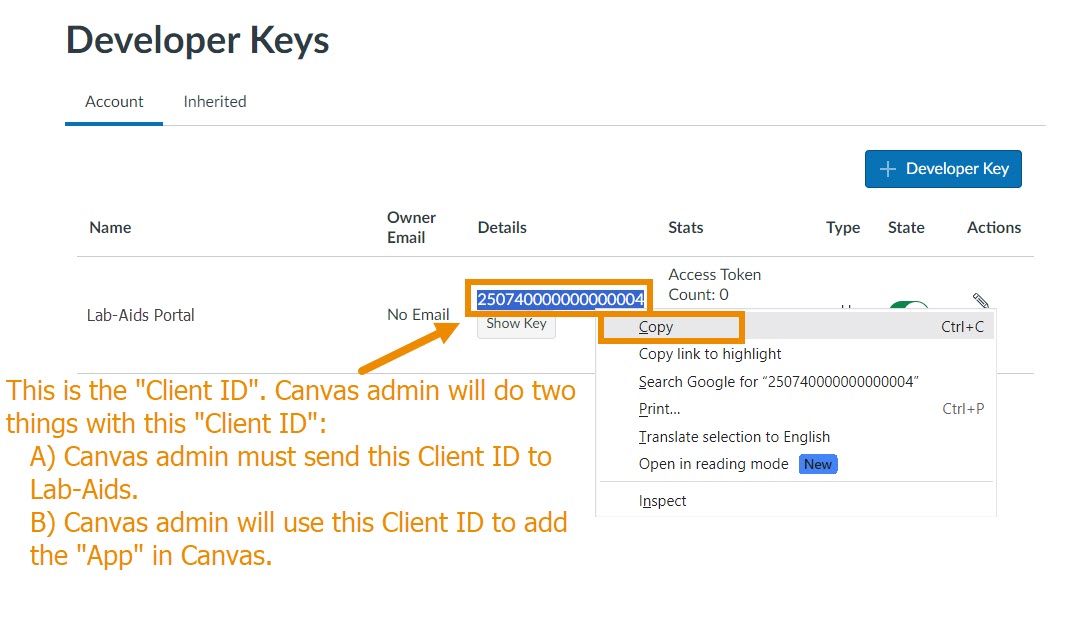
9. On the Developer Keys screen, copy the numeric value under the Details column for the new Lab-Aids tool. This is the Client ID. Canvas admin will do two things with this Client ID:
-
A) Canvas admin must send this Details/Client ID value to Lab-Aids. This is an important step. The integration will not work unless Lab-Aids has this information.
-
B) Keep the "Client ID" copied so that it can be used to add the external tool to Canvas by "Client ID" (Step 5 on the LTI 1.3 Integration Setup Page).
-
Important: Tool will not be functional until Lab-Aids confirms the Client ID has been added into the Lab-Aids Portal LTI Setup.