These instructions are for the teacher-focused Google Classroom integration process.
- Admin Instructions
- Approve "eLearning App" in Google Workspace
- Provide instructions to teachers
- Assign licenses to teachers once they click "Log in with Google Classroom"
- Teacher Instructions
- Student Instructions
- Troubleshooting
Once your classes have been rostered, you can check out the different ways to utilize Google Classroom integration as a teacher.
Admin Instructions:
1. Google Workspace Admin needs to approve Lab-Aids "eLearning App" in Google Workspace.
2. Once Lab-Aids has set up your school for integration, admin needs to provide instructions to teachers (see the teacher section below for instructions).
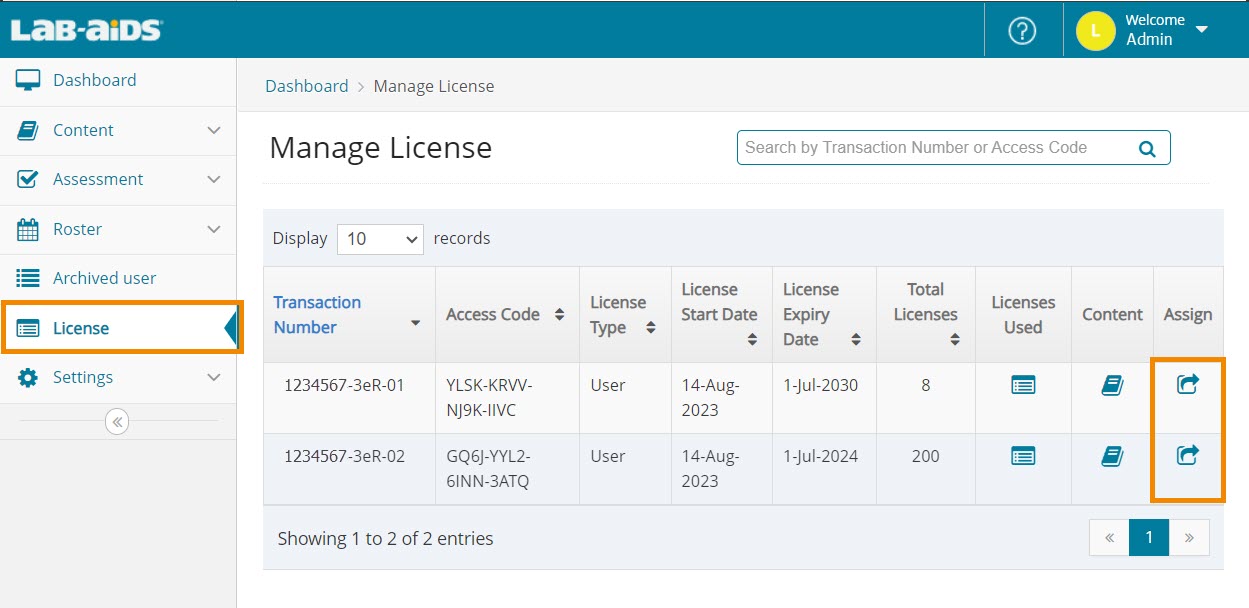
3. Important: Admin must assign licenses to teachers.
- Teachers won't exist in the portal until they click the "Log in with Google Classroom" button, which means teachers must inform you once they have successfully done this.
- Teachers will not be able to view content or assign books to students until this step is done.
Teacher Instructions:
General process:
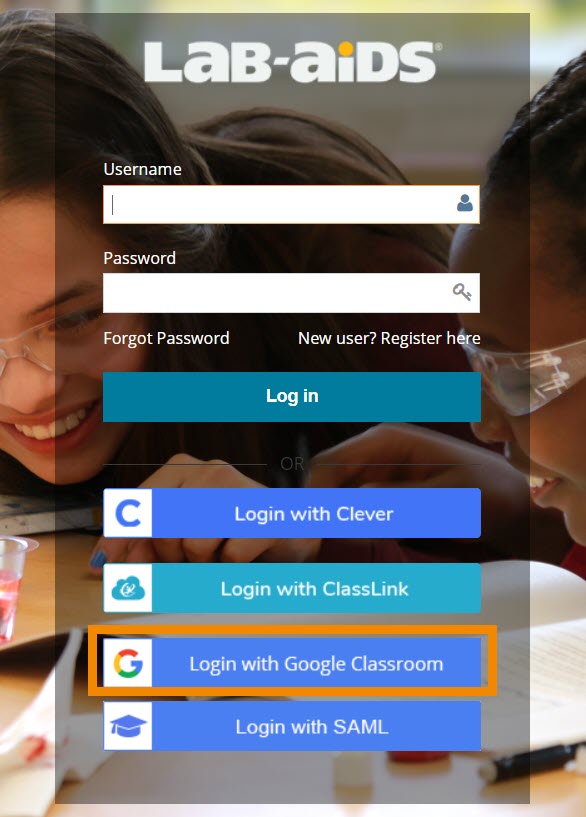
- Teachers click "log in with Google".
- Teachers select their classes to sync.
- Teachers must contact their admin after first successful login so that the admin can assign licenses to teachers. Teachers will not see content until this is done.
- Teachers assign books to classes/students.
- If students receive an "Access Blocked" message, it means the Lab-Aids "eLearning App" was not yet approved. Reach out to your Google Admin to have them approve the app.
1. Teacher must log into the portal at https://portals.lab-aids.com using the "Log in with Google" button. This will auto-roster your teacher account. You will be brought directly to the Google Classroom screen to select classes to sync.
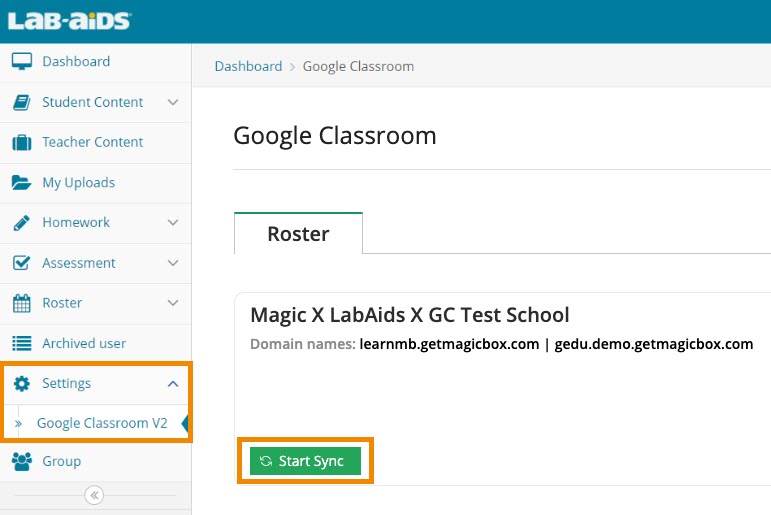
2. Click the green "Start Sync" button to select classes to sync.
- To get to this screen manually, click on the "Settings" menu on the left and click "Google Classroom V2".
- If rosters are not yet available for the current school year, skip to number 6 and come back to steps 2-5 when rosters are ready.
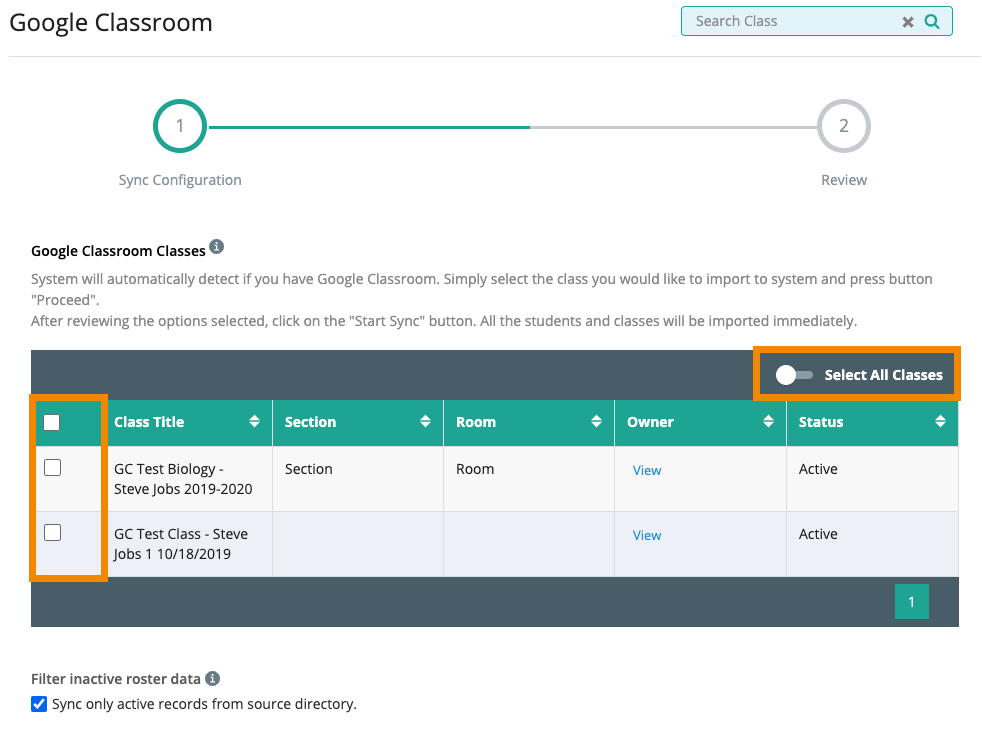
3. Select classes to sync:
- Sync individual classes by selecting the checkbox next to each class name. Any students or teachers associated with these classes will be synced.
- Alternatively, you can sync all of your classes by toggling the "Select All Classes" toggle on the top right of the class list. But, this would also sync any old or non-Lab-Aids classes/teachers/students, which adds unnecessary data "clutter" to the system and is not recommended.
- Rosters for these selected classes will sync each time you log in or complete a manual sync.
4. Review the sync options and select whether you'd like to receive daily successful sync emails or only error sync emails. Click "Start Sync." Note: The sync typically takes just a few minutes to complete.
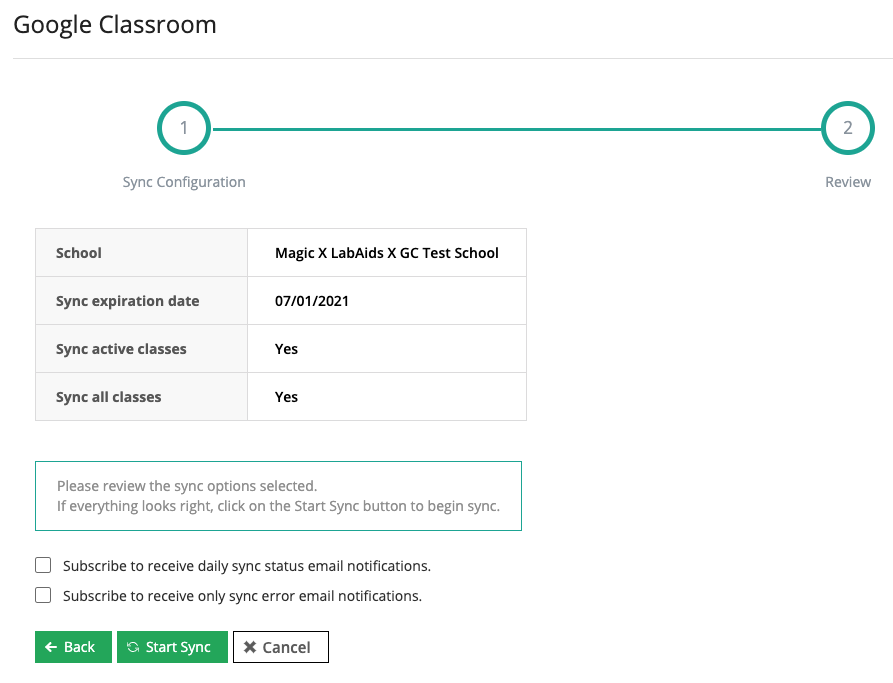
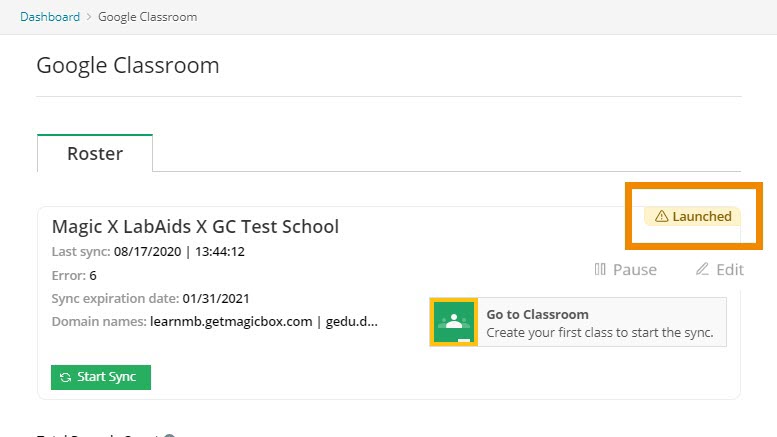
5. The next screen will show the sync as "In Progress". Refresh the screen after a few minutes to see the sync status as "Launched". Moving forward, the sync status will always show as "In Progress" because the system is syncing these chosen classes automatically each time you log in. This sync will only take a few minutes, and you can refresh the screen to see the "Launched" sync status.
- To modify which classes have been chosen to sync, click "Start sync" or "edit" at any time. Unchecking classes that have already synced will not delete them from the portal; it will just stop auto-syncing them upon login.
6. Important: At this time, you must contact your admin to let him/her know you have logged in and are ready for licenses to be assigned to you. Your admin will need to assign you the correct licenses. You will not be able to view content or assign books to students until your admin assigns licenses to you.
7. Verify the Initial Roster Sync for Accuracy: Once the initial sync of Class Rosters is complete, teacher should review rosters for accuracy and completion. Again, this initial sync will likely only take a few minutes to complete.
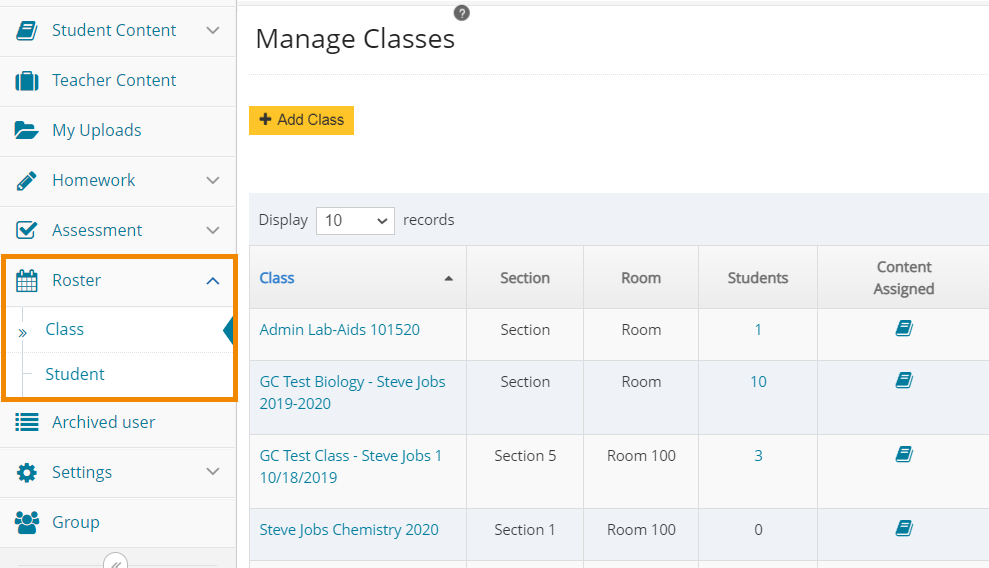
- You can view classes and their rosters at Roster > Class.
- You can view students' class associations under the Roster > Student menu under the "Class" column.
- If any students or classes are missing, 1) please verify that you have selected accurate classes to sync from the Settings > Google Classroom V2 screen, and then 2) please verify in Google Classroom that those missing students have are active and have joined your classes in Google Classroom.
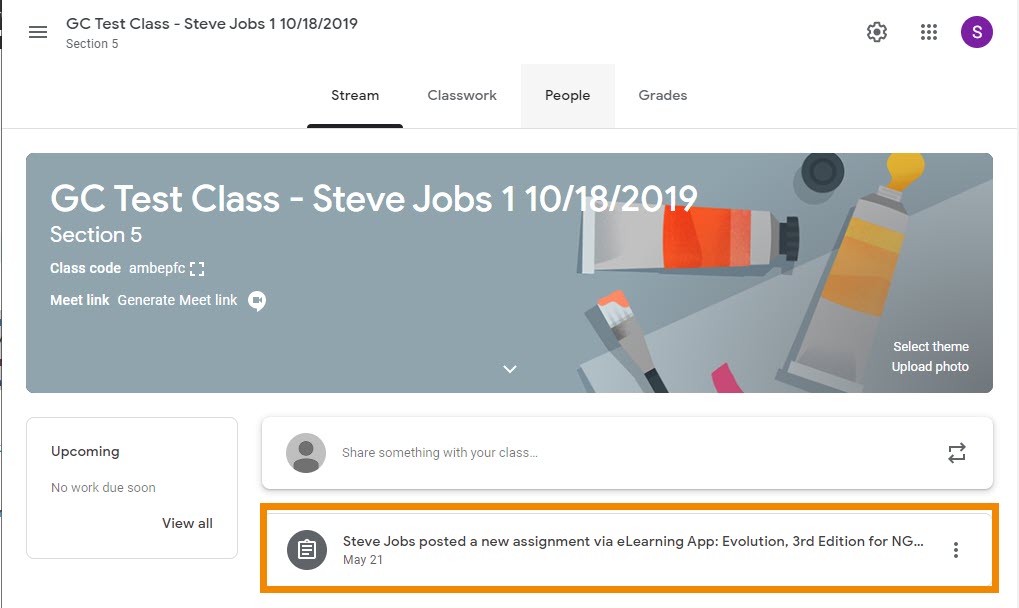
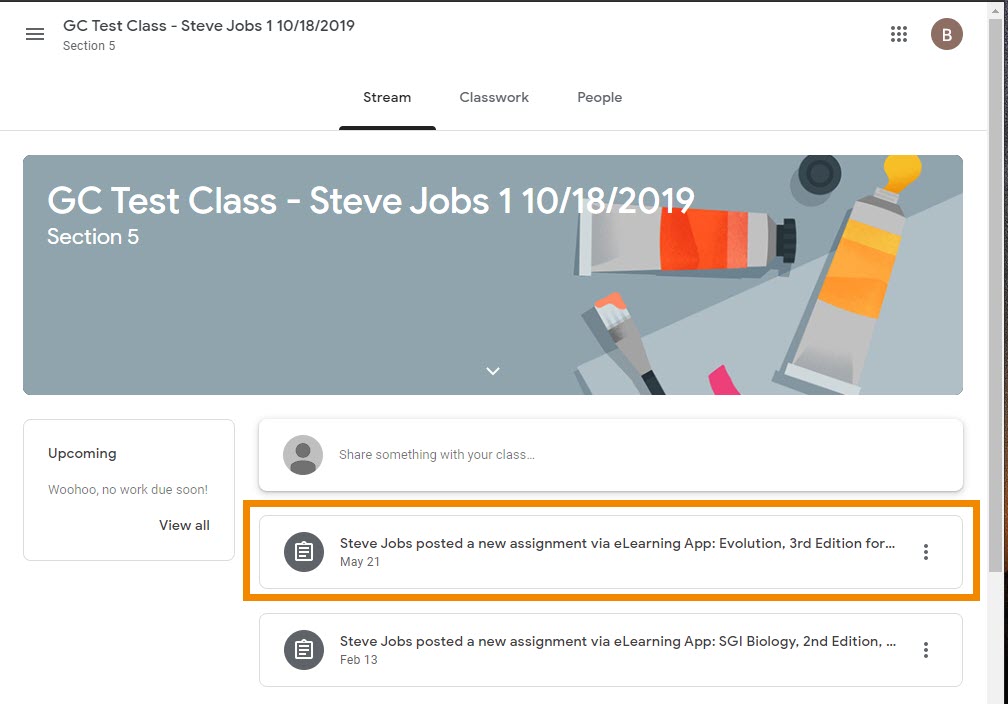
8. Assign Books to Students: Once you have contacted your admin and your admin has assigned you the license(s), you'll need to assign books to students.
- If you click the checkbox to "Assign to Google Classroom", links to the books will automatically appear in the Google Classroom streams or classwork. Screenshot below. These automatic postings can be deleted from the "Classwork" section.
- If you'd instead prefer to manually post your own link to a specific page of a specific book, please navigate to this page.
- If you receive an error message that you have exhausted the number of available licenses, please contact your admin so they can ensure you've been assigned the student PO / set of licenses.
Student Instructions:
1. Once you assign books to your students, students can access their books in two ways: A) by logging into the portal directly, or B) from Google Classroom.
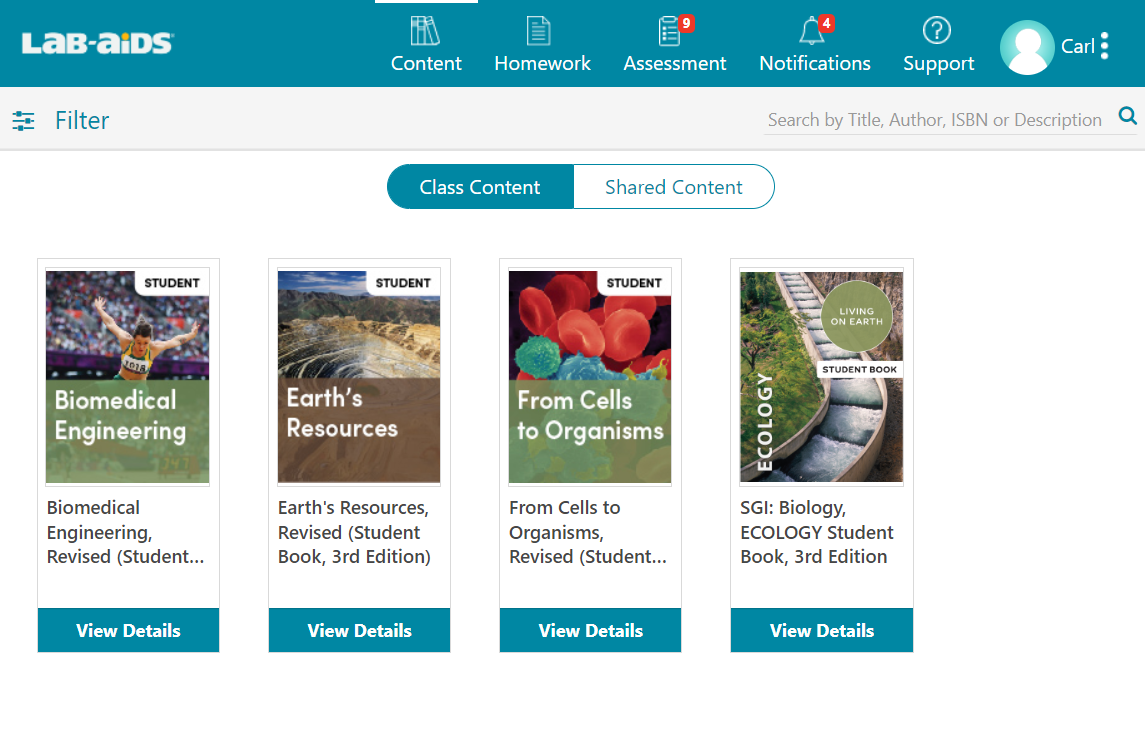
A) Students can log into the Lab-Aids portal directly by going to https://portals.lab-aids.com and clicking "Log in with Google". Upon login, they will be brought to their bookshelf, where they will see all books assigned to them.
B) Students may also see books appear in their Google Classroom class streams or Classwork. Students click on the book/assignment to view the book in the portal. If prompted to log in first, just click the "Log in with Google" button.
Troubleshooting for Teachers/Admins
- Sync Info: Moving forward, your teacher account will sync your chosen classes automatically each time you log in. Your sync will show "In Progress" each time you log in, but if you refresh that screen or navigate away and back to that page after a few minutes, you should see the sync has changed to "Launched" status.
- To get to the sync screen manually, go to Settings > Google Classroom V2. If necessary, you can edit your chosen classes by clicking "Start Sync" or "Edit".
- If you receive an error message that you have exhausted the number of available licenses, please contact your admin so they can ensure you've been assigned the student PO / set of licenses.
- If students receive an "Access Blocked" message when attempting to log in, reach out to your Google Admin to approve the Lab-Aids "eLearning App".
Viewing Sync Status/Errors:
1. Upon login to the portal, or after completing a sync, admins/teachers will be brought to the sync status screen (Settings > Google Classroom V2):
- View the sync status in the top right corner: Launched (yellow = with errors), Launched (blue = successfully), In Progress, Failed. After syncing, refresh the screen to view the completed sync status.
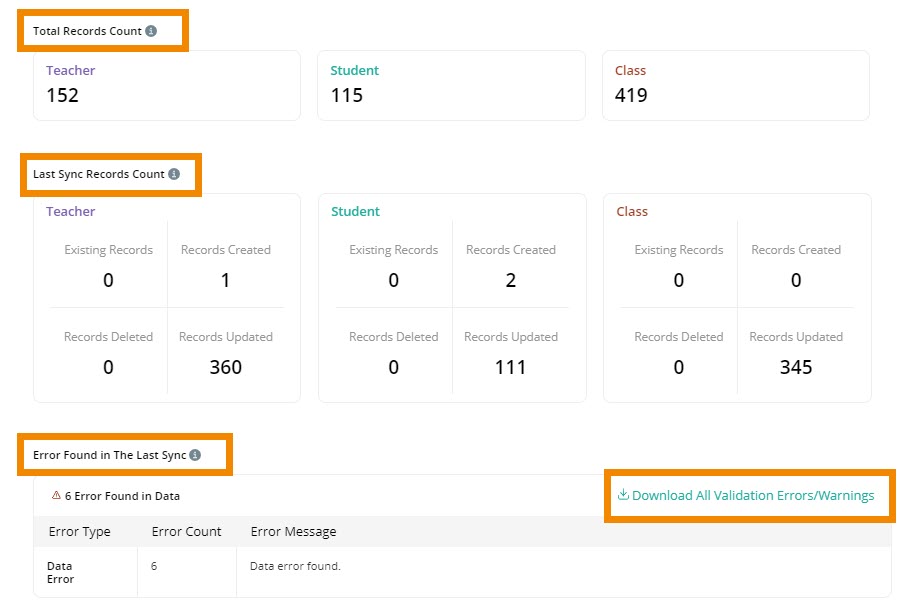
- This screen also displays two sections to view sync data. The first section displays the total numbers of classes/teachers/students synced for your district. The second section displays the classes/teachers/students created or updated after the most recent sync.
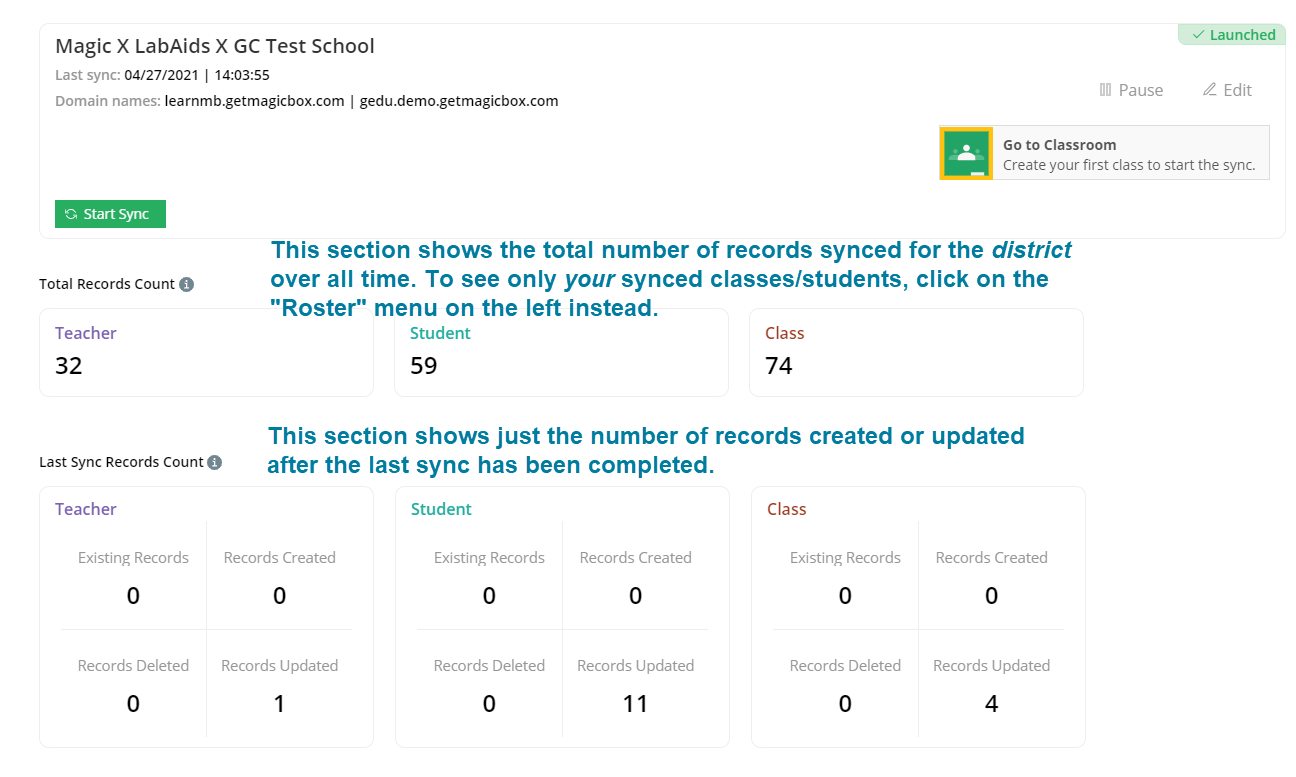
- Teachers: To view only your synced students or classes, click on the "Roster" menu on the left instead.
- Admins: To view all synced classes, teachers, and students, click on the "Roster" menu on the left.
- If there are any errors, scroll down further to view and download any sync error reports. If you selected to receive sync error emails, this downloadable error log will also be emailed to you after syncing.
Modifying Sync Details:
The system will automatically sync your previously selected classes each time you log into the portal. This means that, at minimum, new students who join your classes will be synced each time you log in or complete a manual sync.
Upon login to the portal, or after completing a sync, you will be brought to the sync status screen (Settings > Google Classroom V2). At this screen, teachers/admins will see options to Pause and Edit a sync.
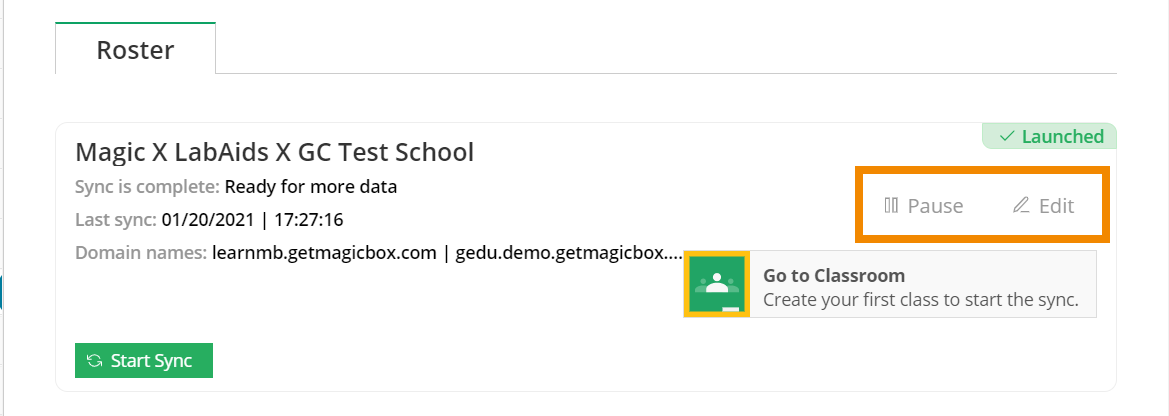
- Pause: Pausing sync means that the roster information will not be regularly updated via the scheduled sync process. You can always resume regular sync at a later time.
- Edit: Editing the sync (this is the same as clicking "Start Sync") allows you to edit the sync details you chose in your original sync: Classes selected to be synced, which emails to receive, etc.
- Start Sync: Same as "Edit". Edit the sync details chosen in your original sync.
Note: Deselecting classes from the sync menu will not delete the class rosters from the portal. It will just stop the class from being synced upon each login.
How teachers can utilize Google Classroom Integration:
Once your classes have been synced, you can check out the different ways to utilize Google Classroom integration as a teacher.